How to Make A Pallet Wood Picture Frame
VIDEO
A while back, I wanted to make some pallet wood picture frames. I ended up making two sets: one for us to keep and put in the baby's room (where the pallet wood sign and pallet wood arrow art are located) and one set was for my niece to frame some photos I took of her riding her horse. Take a look at the video to see how I built it:
BACKGROUND
My niece is really into horses. If you have not seen the video I made about the equestrian jumps she and I made, take a quick look below:
To continue in that theme of horses, I took some photos of her riding her horse some time ago, and she was wanting to frame them. The pallet wood frames seemed like a good match for this, since they were rustic and looked kind of like an old barn.
TOOLS & MATERIALS
Table saw - http://amzn.to/2yxWdQr
Miter saw - http://amzn.to/2ynOXJv
Nail guns & compressor - http://amzn.to/2xUlRTb
Wood glue - http://amzn.to/2kOWYCo
Glass
Glass cutter - http://amzn.to/2zEc29E
Picture frame mat - http://amzn.to/2jiXyb7
Picture hanger - http://amzn.to/2zGsCGd
STEPS
As I was going through the pallet wood I had on hand with nails removed, I specifically looked for boards that were already a similar thickness. This can be tough to do with pallet wood at times, since so much of it is variable.


Then, I took all of the boards to my thickness planer, and ran them through a few times, just to make sure they were as exact as they could be.

Then, it was over to the jointer to get a straight side, followed up by the table saw to rip strips equal to the size I wanted my frame pieces.


Then, I had to cut a rabbet into some of the boards that would accept the mat, print and glass. I started doing this by just using the fence on the table saw, but after one cut, I didn't feel comfortable doing it this way. There was just not enough of the throat plate on the table saw to really support the work. Instead, I put my crosscut sled on the table saw, clamped a board to it, and referenced off of that board to make the rabbet. This seemed to work pretty well.


Next, it was time to cut the 45 degree angles to make up the frames. I actually made a 45 degree miter sled for my table saw a while back, and this was the perfect use for such a jig. Once I figured out how long I wanted my sides to be, I set a stop block at that point, and I knew that all of them would be consistent from that point on.

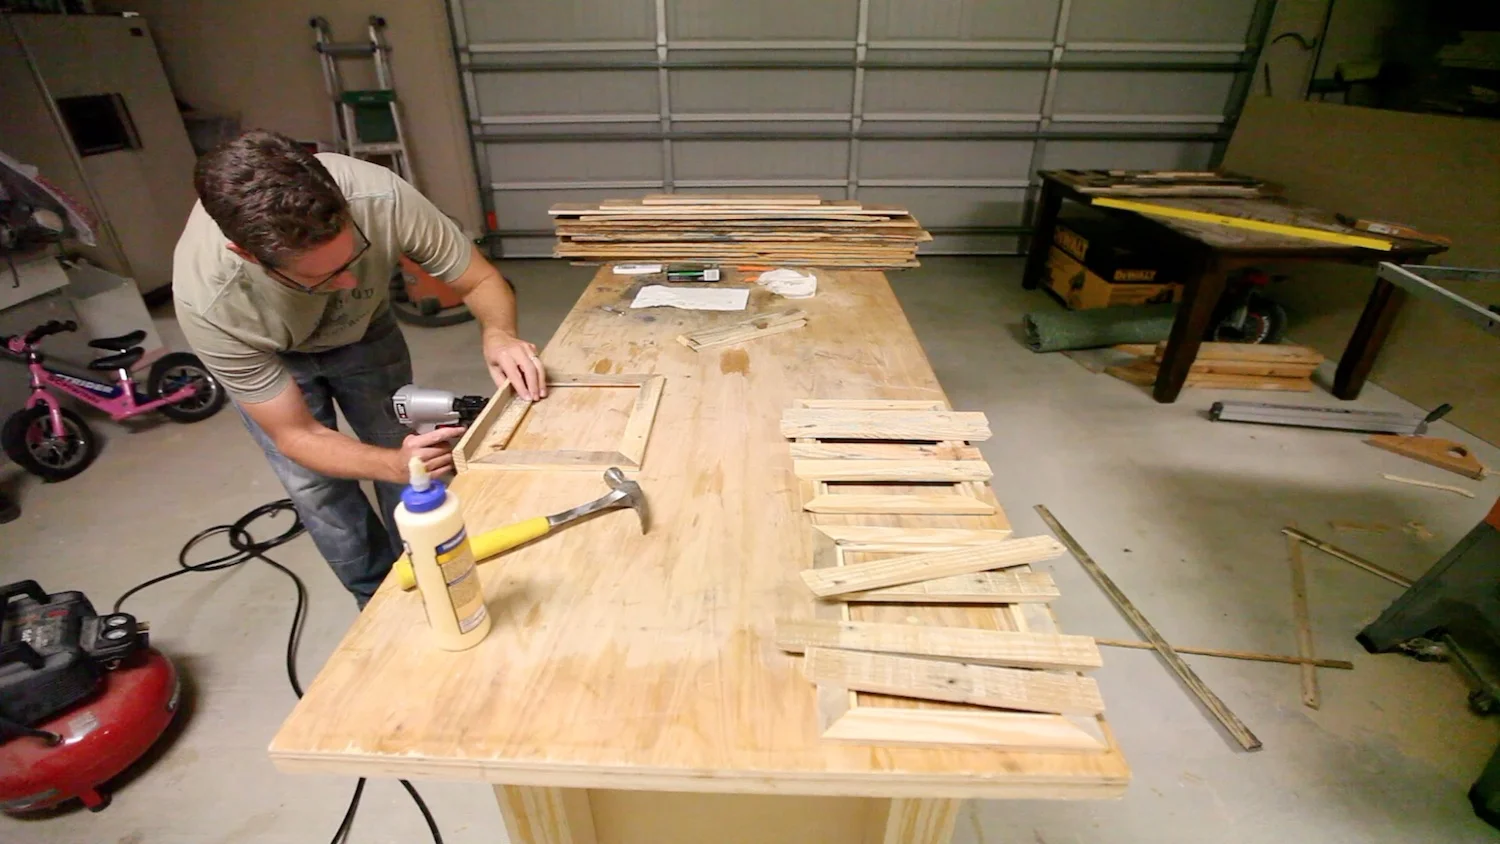
After all of the miters were cut, it was time to start assembling the frames. There were basically two assemblies for each frame since I was going with a design that had multiple pieces to it. I used some wood glue and brad nails, but looking back, I should probably have just used glue. The material was so thin that some of the nails shot out of the boards, causing me to have to either pull them or use a nail punch to seat them out of view. If you have the miters cut exact, you can get a good glue joint by just using some glue and some painter's tape. Of course, this takes a little longer, since you can't remove the tape until the glue is dry.


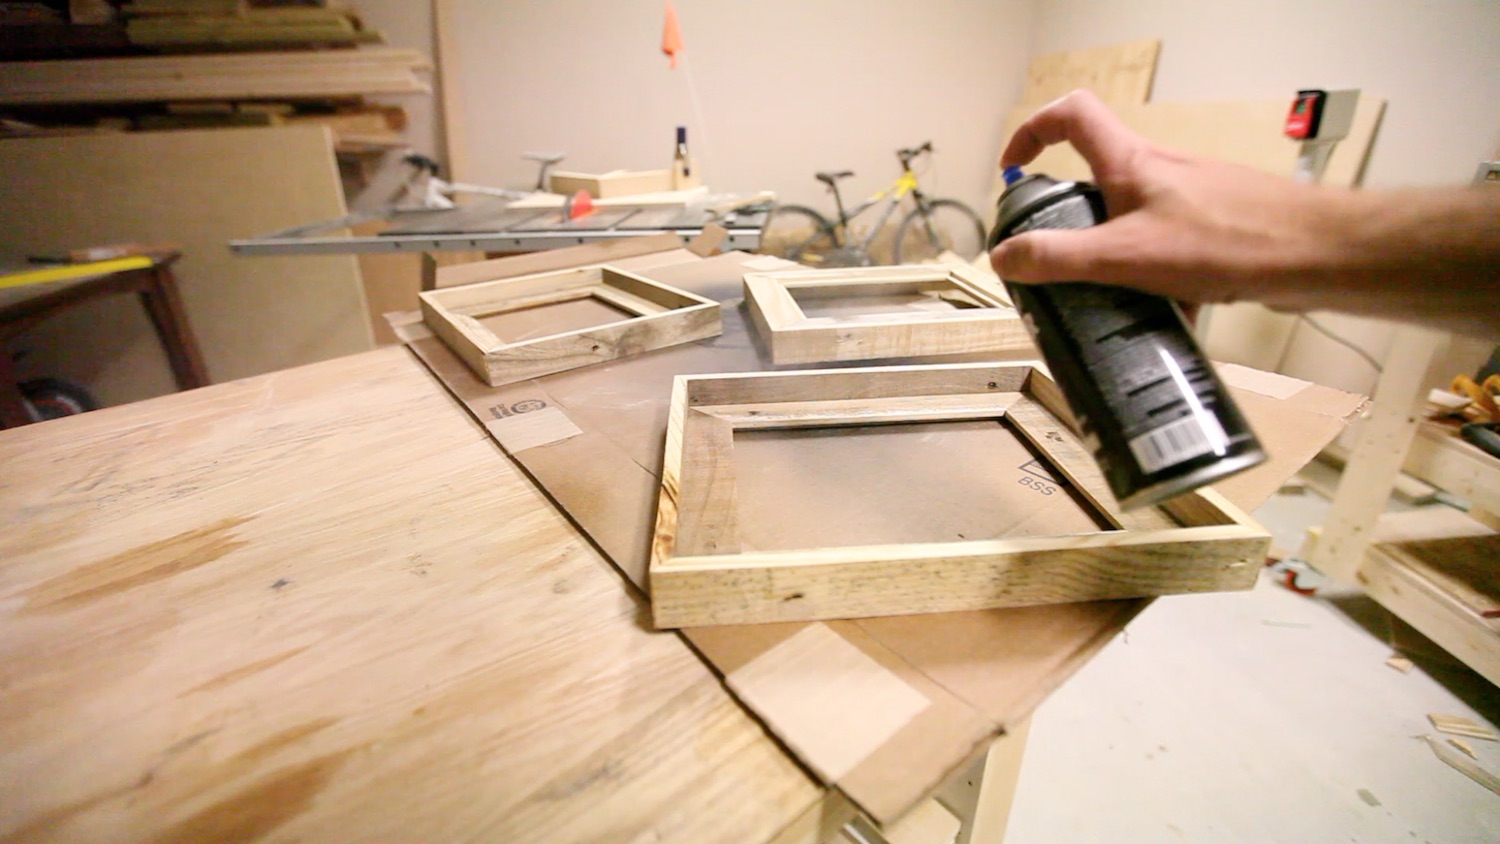
I sprayed on a few coats of spray lacquer, sanding in between coats with 320 grit sandpaper.
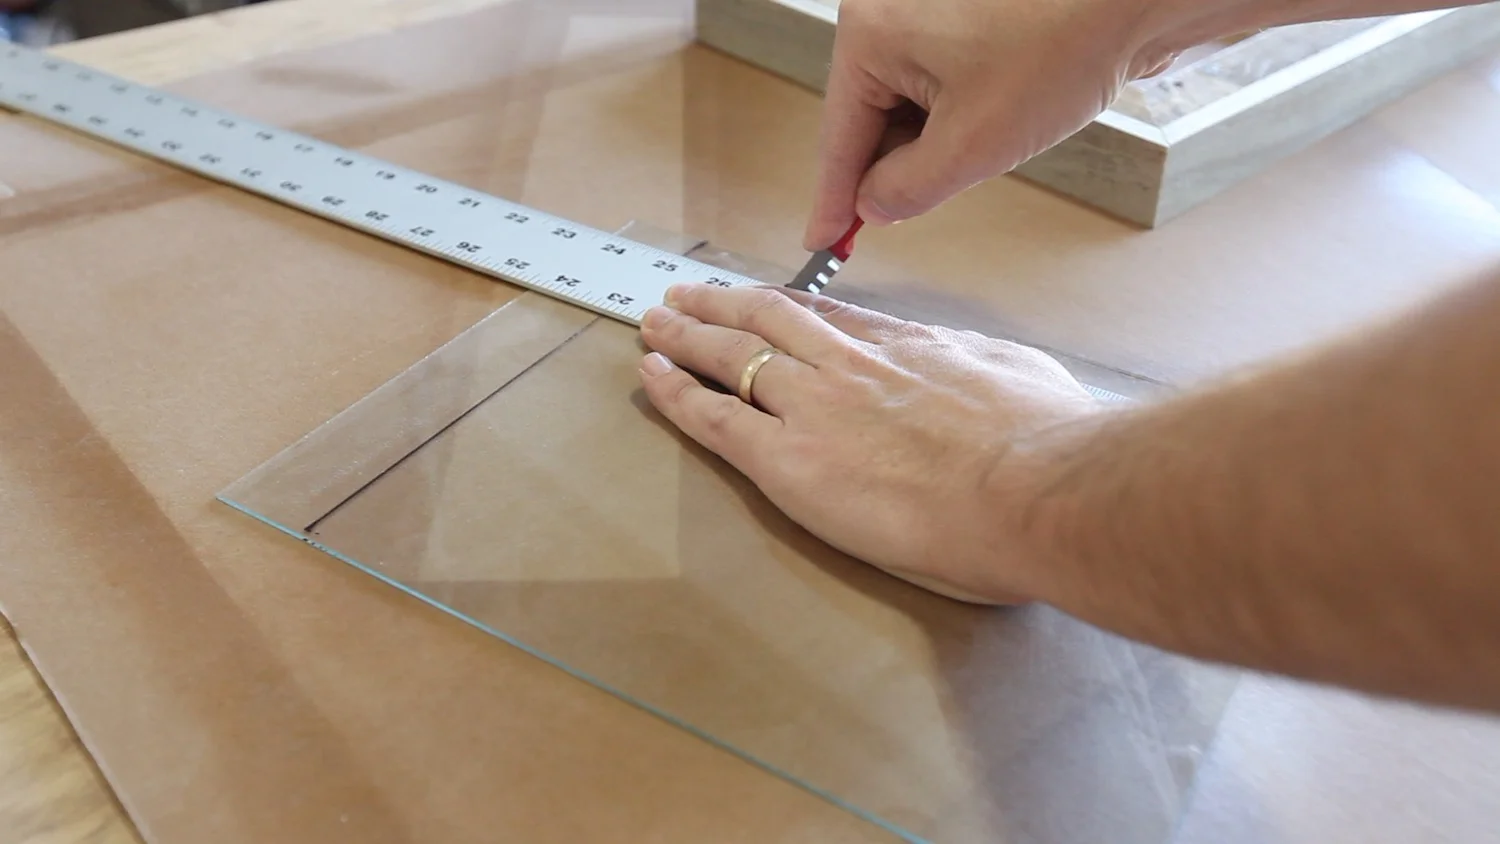
Then, I needed to turn my attention to the glass. I wanted to use real glass, not plexi-glass, so I went to Lowe's and purchases a piece of just regular glass. I had one of those little glass cutters I've seem people use, and I wanted to try my hand at it. I had never done it before, so I really didn't know how hard or easy it would be.
It was hard.

It was harder than I expected. after breaking multiple pieces of glass, and having to go back and buy more, I finally figured out that you must press pretty hard with the tool to get it to score the glass sufficiently. I could also hear a cracking sound, almost like ice on a frozen lake starting to crack through, and then I knew that I was pressing hard enough. If you try this, you'll have to experiment for yourself, but in my experience, I had to pretty much harder than I expected.
Once you score the glass, there are a few methods you can try to break it off:
- Just pick it up and use your hands with pressure near the scored lines to break the two pieces apart. Sometimes, it can be hard with this method to get the pressure along the scoring to be even, and it will break cleanly in one part, but not in others.
- Use some special pliers that help you to get the pressure right where the score line is
- Use a dowel or the end of a table along the score line. This can help apply pressure all along the line. The dowel method seemed to work particularly well for me, and with minimal effort.


I just purchased mats that were the size I needed, but in the future, I plan to try to cut my own. The ones I got were very reasonable, and I got a pack of about 10.

As I started to put everything into the frame, I needed to secure everything in the back, so it would not all fall out. I first tried some of those glasier points that I've seem some people use. This didn't work for me at all. I'm not sure if it was just this particular wood or what, but they would not go in the wood. Then, I tried some really small finish nails that I have. I could not get them to hold the contents of the frame securely, so I tried to kind of bend the nail toward the frame contents. DON'T DO THIS! In doing so, I put pressure on the side of the glass, where it has no strength, and I broke yet another piece of glass!
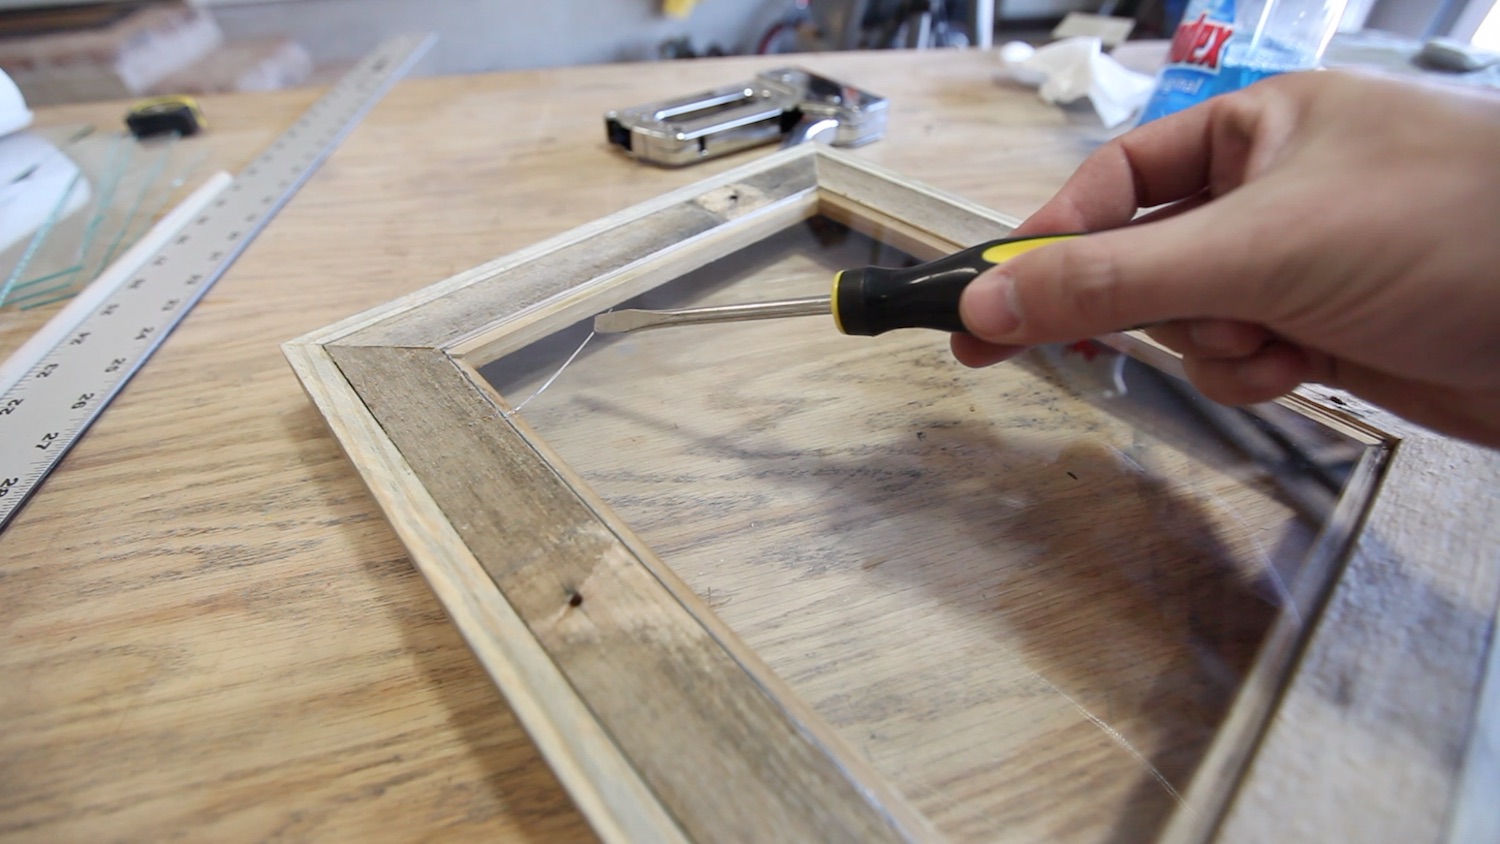

I finally decided to just cut some small pieces of wood, and use those to secure the contents of the frame. This method seemed to work pretty well.

All that was left was to add some way to hand the frames. I used the little jagged picture hangers since these were not very heavy frames. I figured they could be hung, even in drywall, with simply a nail. No special hardware needed.
HINT: Use some needle nose pliers to hold the tiny nails as you hammer in the picture hanger. This will allow you to be more precise with how you hammer, and it will save your fingers.

Hang the frames and you're done!

Thanks for taking the time to check out this project! If you have any questions, I'd love to hear them. How would you have done any of this differently?